Wednesday, February 16, 2022

Peach Blossom

 Hi there. Today I am sharing another project using new releases from Spellbinders. I've shared my project using Lilac & Freesia set and today am showcasing Peach Blossom Etched Dies from the Garden Favorites Collection by Susan Tierney-Cockburn.


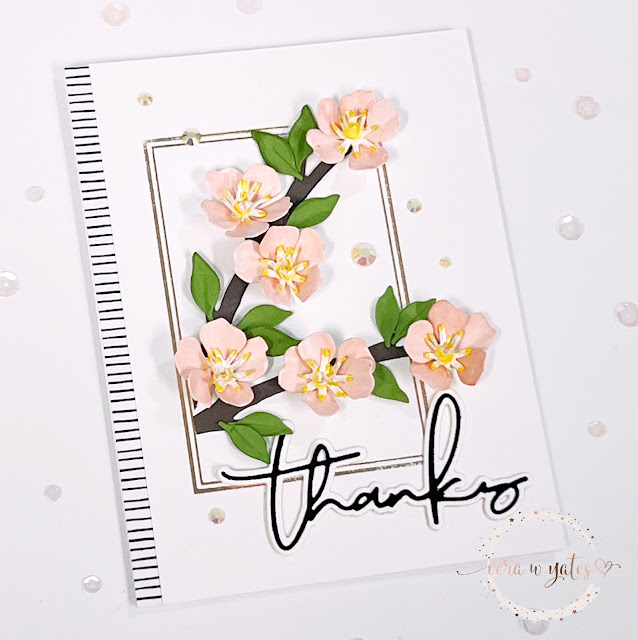
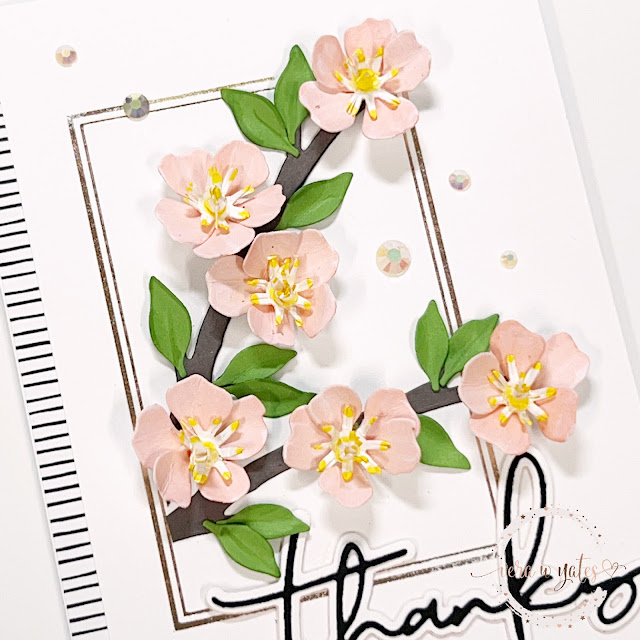
To start, I die cut all the pieces and then colored the flowers with Copic markers. For the leaves I used colored cardstock. Like on my previous post, to shape the flowers I used a dense foam mat and laid all the petals on top of it and press a round stylus to the center of the petal. This brings all the petals up. I also curl the edge of the petal. Assemble all the flower pieces. While waiting for the glue to dry, I work on the background.

For the background I hot foil one of the frame from Essential Duo Lines Rectangle Glimmer Hot Foil Plates. Trim the panel. Add a strip of patterned paper to the card base and then add the panel. Arrange the branch, leaves and flowers on the card.


For the sentiment I used used Yana's Layered Script Sentiments Etched Dies. Finished the card by adding some rhinestones.

If you'd like to see the other 3D flower cards please scroll down to see my previous posts. Well peeps, that's all from me today. I hope my card today inspire you to get crafty. Thank you all for stopping by here.

Tuesday, February 15, 2022

Freesia Birthday Card

Hi peeps. I am excited to share today's beauty. Today, I am showcasing Spellbinders' Freesia Etched Dies from the Garden Favorites Collection by Susan Tierney-Cockburn. This set is fun and the flowers easily put together.


To start, I die cut all the pieces and then using ink blender I added some pink to the flowers and some green to the leaves. For video on how to put together the flower you could watch Susan's video HERE. I find it so much easier watching her video then reading step by step tutorial. But, I can tell you that this one is pretty easy to put together. After I am done coloring and assembling the flowers, I out them asode and work on the card background. 

To ground the flowers, I hot foil the frame from Geo Foliage Glimmer Hot Foil Plate & Die Set from the Yana’s Blooms Collection on a panel of cardstock. Adhere the panel to card base. Then arrange the flowers and the leaves on the panel. For the sentiment I used Yana's Layered Script Sentiments Etched Dies. Finished by adding some dew drops.

I hope you enjoy today's card. Funny story, I fell of my crafting chair the day before while getting my blog post ready and I literally landed on my bottom. Needless to say I am super sore and in a bit of pain today. My boss was laughing though when he heard the story. He said, you're telling me you got injured while crafting?? LOL, when you put it that way... So, right now I am making appointment with my doctor to see whether I need to do any x-ray or not as I landed pretty hard on hardwood floor. No carpet to cushion my fall.

Well, that's all from me today peeps. May your Tuesday be a good one. 

Monday, February 14, 2022

Lilac Thinking of You Card

Hi all. Lately besides stencil, I find myself playing more and more with flower dies. I am not good at growing plants, so paper flower is kind of my way to do it. Hah! I sure was excited when I got the chance to play with Spellbinders' Lilac Etched Dies from the Garden Favorites Collection by Susan Tierney-Cockburn. This set is gorgeous!!

Here's my take on showcasing this Lilac dies set.


If you love 3d flower dies, then I think you'd love this die. I die cut all the pieces from colored cardstock. If you never use Spellbinders dies, especially the flower dies, on the die itself you could see how many times you need to run the die to make the flower. Simply follow the direction. For these lilacs, after I die cut them, using a dense foam material underneath, I shaped all the flower pieces by pressing round stylus to the middle part of the each flower. This make the petals all went up. Then on the leave base adhere all the flowers one by one. The result is this fun & beautiful cluster of lilacs. For the center of each bloom, I used enamel drop. While waiting for the enamel drop to dry, I work on the background. 

To ground the flowers, I hot foil the frame from Geometric Floral Glimmer Hot Foil Plate & Die Set and the splatter from Splatter Sentiments Glimmer Hot Foil Plate from the Yana’s Blooms Collection. Once this done, arrange the flowers and the leaves. Finish by adding hot foil sentiment from
Everyday Sentiments II set and adhere some rhinestones.

I am pretty thrilled with the way this card turned out. I hope you like it as well. I have more up my sleeves, so please stay tune and come back tomorrow. Happy love day peeps!

Tuesday, February 8, 2022

Spellbinders' Glimmer Foil Fiesta Sale

Hi all. If you've been wanting to expand your hot foiling stash, Spellbinders is having 40% sale of select hot foil products  now through Sunday 2/13/2022. Simply click on the image below and it will take you straight to the collection. 


Am definitely taking advantage of this offer. After all we can't have too many hot foiling stash, right?  


Spellbinders' March Stitched Die

Hi there creative peeps. Happy March. I want to pop in today to share my Spellbinders' March Stitching Die Club card. Spellbinders has l...