Friday, December 3, 2021

You're In My Thoughts

Hi all. I just want to pop in to share this card that I made using Spellbinder's Clear Stamp of The Month


 I love everything dainty and this set with their simple alphabets and minimalist flower give it a dainty feeling to it. Here, I stamped the letters to create the word hello and also stamped the flowers several times and colored them with Copic. I highlight the sentiment by adhering them to a hot foiled geometric background from Geometric Floral Glimmer Hot Foil set. Once that done, adhere all the colored flowers. Finished by hot foiling you're in my thoughts sentiment (from More Sentiments Glimmer Foil set) on a strip of cardstock and add it to the card. That's it, keeping it simple & clean. 

That's all for me today and I hope your Friday is a good one. Have a blessed day all!

Thursday, December 2, 2021

Spellbinders' Beauty Is Everywhere

Hi peeps. Happy December. Time flies doesn't it? I am thrilled to share Spellbinders Card Kit of The Month. Their December "Beauty Is Everywhere" kit is filled with beautiful, vintage & elegant images. I didn't craft much in November as my work been super crazy and stressful. But, this past weekend I get to craft and enjoying playing pretty stuff. I sure miss crafting.

Let's get on to the cards shall we? Here's the first card.


How pretty is this flower? It's one of the cardboard sticker that came in the  kit and I paired it with the polaroid frame to highlight its beauty. Then from the printed images collection I used the butterfly and sentiment. The orange flowers and the sentiment were made using the dies that came with the kit.

Next is this beauty that I just love because I love butterflies. I keep the card simple as I want the butterflies to take center stage.


Did you notice the beautiful blue cardstock? It's from Spellbinders' cardstock collection, called Glacier and it has become my favorite cardstock that I keep in stock. It just so soft and such a pretty blue.

Now, my 3rd card makes think vintage. I rarely make card in this style, but hey it's always good to push yourself out of your comfort zone now & then, right? 


I simply used patterned paper from the included paper pad and several of the printed images. The par avion is actually a shimmering sticker and really pretty. And since I was on a roll, I made an extra card. After all, I also love bird and I just have to use this gorgeous bird image and the pretty rose.


For this last card, the patterned paper make a quick background. Then I just layered the roses and the bird. And finish by adding the sentiment. I hope you enjoy these cards as much as I enjoy making them. Well peeps, that's all from me today. May your December be filled with joy. Cheers...

Saturday, November 20, 2021

Spellbinders' Joyful Christmas Kit

Hi peeps. I am excited that I finally able to share Spellbinders Card Kit of The MonthTheir November "Joyful Christmas" kit is filled with beautiful, fun images & fabulous Poinsettia dies that totally put me in Christmas spirit. This awesome kit was originally planned to be released by November 1st but due to shipping delays, they are now available A la Carte. Yay, that's good news for those who maybe want to give Spellbinders' club a try before subscribing for sure. Here's a peek at what included with the kit.


Let's get on with the cards, shall we? As someone who loves soft colors, this kit is totally up my alley. 


For my 1st card, I started by hot foiling one of the frame from Essential Duo Lines Glimmer Rectangles Glimmer Hot Foil Plate set with Blush hot foil. Then I hot foil the sentiment from Mini Christmas Sentiment Strips Glimmer Hot Foil & Die set. Once this done, I trimmed the panel and adhere it to the card base. Then I went to town just layering several of the printed images. Ilove that the printed images has beautiful foil on them as well.

Then on to my 2nd card. This time I also use one of the patterned paper from the paper pad that's included with the kit. Just like the 1st card I layered several of the printed images and adhere some of them with foam adhesive to create dimension.

.


Now, on to the 3rd card. Who doesn't love some shiny gold on their card? This gold foil patterned paper is one of my favorite from the included paper pad. I feel like gold foil just add instant elegance to a card. Then using the dies from this kit, I made the Poinsettia and the leaves. Before adhering the red Poinsettia, underneath I actually placed the soft pink Poinsettia like the ones I used on the two cards above. Here on the pic it looks more white, but it's actually soft pink.


Arrange the Poinsettia and the leaves. I also added some shimmer to the Poinsettia with shimmer marker. Add some yellow stickles glitter to the center of the flower and red stickles glitter to the berries. To make it more festive I added some enamel stickers from the kit and finished by adding the foam sentiment.


There you go peeps a trio of Christmas cards. Do you have preference as to softer or bolder color? Well, as we're only a few weeks away from Christmas, I hope today's cards help brings some more inspiration for your Christmas cards project. I hope this weekend you get a chance to do some crafting. 

That's all from me today. Wishing you all a lovely and beautiful weekend. 

Thursday, November 11, 2021

Lyrical Layered Floral

 Hi peeps. How's it going? Today I want to share this card I made using Spellbinder's Lyrical Layered Florals Clear Stamp & Die Set from Sweet Serenade Notecards Collection by Becca Feeken.


To start I used one of the scalloped frame the Scalloped Rectangle Glimmer Essentials with Sentiments set with Blush foil. Once that done, I trimmed the panel and put it aside and I start working with the floral image. I stamped the image and die cut the floral. Next, I played with the placement and before adhering the flowers, I marked the opening and heat foil the sentiment. Only after this done that I adhere the panel to the card base. To finish I simply adhere them on the card with foam adhesive.


This is a pretty simple card, but I think the glimmer foil help to elevate it up. What do you think? Well, that's all for me today. Have a blessed day everyone!

Tuesday, November 9, 2021

Oriental Lillies

Today I am excited to share a card I made featuring one of my favorite flower as I am showcasing Spellbinders Oriental Lily and Wellies from Garden Club by Susan Tierney-Cockburn.


Don't you just love the word wellies instead of rain boots? I don't know why, but I get such a kick at learning this new term. :) I die cut the wellies from watercolor cardstock and watercolor it with Karin markers. Then I die cut all the flower and leave pieces from white cardstock and color them with Copic.
Put all the pieces together. Before adhering all the pieces, I adhere a soft patterned paper for background. Also for additional filler, I die cut a couple pieces of leaves from Simply Perfect Layered Bloom set.


 To finish the card, I add sentiment using Blush glimmer foil with More Sentiments Glimmer Hot Foil Plates. So, what do you think of these 3D floral cards? As someone that love flowers, I sue enjoy making them and these cards definitely will go to some special people in my life. Well peeps, that's all for me today. Thank you for stopping by here (do people still checking out blog??). Happy Tuesday!

Monday, November 8, 2021

Bouquet of Narcissus

Hi peeps. Phew, I really haven't blogging for a while now. My work been super crazy and I had to work over time a lot that by the time I got home, I just don't have much energy to craft. Anyway, this past weekend, I actually just forced myself to slow down and take time to take care of myself. And, that means, crafting. Crafting makes me happy and it helps slow down my running mind. :)

Luckily, I have some gorgeous die sets from Spellbinders to play with. For today, I am sharing a card I made using Daffodil/Narcissus and Antique Vase with Honey Bee from Garden Club by Susan Tierney-Cockburn.


My gardening knowledge is a bit limited, so I browse Pinterest and YouTube to make sure I create the flower properly. :) Once I figured it out, I went to town and putting together these bouquet. For the flower pot, I die cut it from a piece of watercolor cardstock. When it comes to large piece I like using watercolor to color them. Once it dry I adhere it to the card base.

Then, adhere the flowers and leaves to the card. Yes, this card is definitely not the kind you can just mail on regular envelope. You either use small priority box or hand deliver it as it's pretty bulky.


For the sentiment, I used the Blush glimmer foil with More Sentiments Glimmer Hot Foil Plates. Finish the card by adding the die cut bee and some enamel dots. Making this card definitely get my creative mojo going. I was feeling a bit rusty, but so glad that I get to craft a bit. Please swing back by tomorrow as I will share more 3D floral card. Happy Monday all.


Tuesday, October 5, 2021

Spellbinder Sending You

 I always enjoy a good sentiment set and when I saw Spellbinders September Clear Stamp of the Month, I was pretty darn happy, because I could use this set for all kind of occasion. Here's a look at the set:


I know right away that I want to heat embossed the large sentiment and I work from there.


So, I start by stamping, heat embossed and die cut the word "Sending You". Put it aside. Next, I used a Post-It-Note to cover the bottom and side edges of the card base. Then, I ink blend an orange and yellow ink. Remove the tape. Then I used Simply Perfect Layered Bloom dies set to cut the flowers and leaves pieces. Arrange all of them on the card. I also added a little butterfly that came in  Spellbinders Card Kit of The Month. Finish by adhering the embossed sentiment and stamped the word Lots of Love.


That's all I have for today. Thank you for stopping by here and wishing you all a happy Tuesday!

Monday, October 4, 2021

Spellbinder's You Are Stellar Kit

 Hi peeps. Am I the only one asking how could it be October already? This past month been such a stressful month for me work wise that am truly grateful for my card making hobby. It helps keep me sane. It keeps me grounded and allow me to have time of joy just by playing with pretty colors and creating.

Among the projects that I created are these cards I made using Spellbinders Card Kit of The MonthTheir October "You Are Stellar" kit is so pretty and fun to play with. Here's a peek at what included with the kit.


Let's start with my favorite card from this stash.


This foil gold star patterned paper is already gorgeous to start with, but I decided some ink blending of blue and purple would take it to next level. Once I finished the ink blending, I trim the paper and adhere to card base. Adhere the sentiment embellishment and add the feather, flowers and unicorn. And, you're done! Quick and dreamy looking card.

I love unicorns, so this kit is totally up my alley as you can see on my 2nd card.


For my 2nd card, I trim and adhere the patterned paper and also add a strip of gold foil cardstock on the bottom. Next, add the star circle paper and adhere the circle sentiment wit foam adhesive. Finish by adding the unicorn.


For my 3rd card above, I used the framed dies that's included in the kit. Adhere the patterned paper to card base & die cut the frame pieces. Adhere frame and the gold sticker sentiments to the card. I already adhere the stickers when I thought that I should include the unicorn on this card as well. Luckily I was able to tuck in the unicorn circle under the sentiment. Finish by adding the circle sentiment. Now, last but not least another quick card with no stamping at all.


Seriously, when I play with kit, I don't think much. I like to take out all the embellishment pieces and see which ones I'd like to pair together. I tend to be very precise and like to over think things sometime and the kit allow me to be more relax and go with the flow. Just play around, layer things around and see which pieces catch  my attention. For this last card, I just layer all the pieces together.

There you go, 4 cards from Spellbinders Card Kit of The Month, that I hope you find fun and makes you want to create. :) That's all from me today and may your week starts off wonderfully. Cheers...

Friday, September 17, 2021

SugarPea Design Fall Release

Hi peeps! yay, the day we have all been waiting for is here! Have you made your list? You’ve been waiting all week to bring home these new goodies and TODAY at 2 PM EST will be your chance to be one of the FIRST to get to play with all of the NEW and amazing paper crafting goodness. But while we wait for those hours to tick by we have a little more inspiration to share with you today.

Last but not  least, today we're showcasing Book Club & Book Words


Growing up, I love reading and to this day, I still love books. There’s just something comforting about reading a good book.

Would you like to win a $50 Gift Voucher to SPD store? Leave a comment below for your chance to win. TWO lucky commenters will be randomly selected from the Sweet Peek Week comments to win a $50 Gift Voucher! Winners will be announced on our blog: Monday, September 20th.

My teammates has crated some amazing inspiration for you using the products featured here today. Please visit each of my teammates’ blogs below for details on their projects. And while you’re there be sure to leave a sweet comment for them, giving you an extra entry to win!

Thursday, September 16, 2021

SugarPea Designs Fall Sweet Peek Day 4

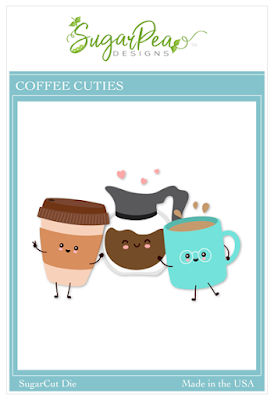
 Yay, we're almost there. Day 4 of SugarPea Design sneak peek and by tomorrow everything we've shown you will hit the store. Today, we're introducing a super cute set called Coffee Cuties! They have hands and legs, how cute is that??


Here's my card using the set:


I paired these cuties with rainbow background (made using alcohol ink). For a coffee lover like myself, this set totally calling my name. Look at the glasses on the cup!! Yes,  there's lots of little pieces to work with, but hey... they're so worth it!

Giveaway time! How would you like to win a $50 Gift Voucher to SPD store? Simply leave a comment below for your chance to win. TWO lucky commenters will be randomly selected from the Sweet Peek Week comments to win a $50 Gift Voucher! Winners will be announced on SugarPea blog on Monday, September 20th.

My teammates has crated some amazing inspiration for you using the products featured here today. Please visit each of my teammates’ blogs below for details on their projects. And while you’re there be sure to leave a sweet comment for them, giving you an extra entry to win!

you are here> Vera Yates <you are here

Wednesday, September 15, 2021

SugarPea Design Fall Sweet Peek Day 3

Hi there. I am back as we continuing with more sneak peek from SugarPea Designs release. Today, we're introducing Shut The Front Door set. This is a fun one to play with!


I won't bore  you with the step by step on making this card. Pretty much you just die cut all  the pieces and assemble them. What I love on this card is the other extra stuff. For example, I love the cat & dog addition (from Let's Stay Home set). Where's the dog you might ask? Just wait... and let's open the door! 


Tadaaaa..... I love that the door open up! I can add additional details and this is where I can also add my sentiment. Fun, right? I feel like the open door brings additional surprise. What do you think?


Would you like to win a $50 Gift Voucher to SugarPea Designs store? Leave a comment below for your chance to win. TWO lucky commenters will be randomly selected from the Sweet Peek Week comments to win a $50 Gift Voucher! Winners will be announced on our blog: Monday, September 20th.

My teammate has created creative & fun inspiration for you using the sets featured here today. Please visit each of our designers’ blogs below for details on their projects. And while you’re there be sure to leave a sweet comment for them, giving you an extra entry to win!

you are here > Vera Yates < you are here

Tuesday, September 14, 2021

SugarPea Designs Fall Sweet Peek Day 2

Hi there. Today as we're looking ahead to SugarPea Designs release coming this Friday, I want to share a sneak peek of Happy Little Village, Home Is With You set.


This set can be used for different occasions, from welcome home to congratulate a friend on their new home or even for Christmas card. For my card, I start by die cutting the scallop frame and hills from Card Front Element Builder. Then stamped the houses, fences and tree, die cut and arrange on the scallop panel. Stamp the sentiment and finish by adding some sequins.


Would you like to win a $50 Gift Voucher to SugarPea store? Leave a comment below for your chance to win. TWO lucky commenters will be randomly selected from the Sweet Peek Week comments to win a $50 Gift Voucher! Winners will be announced on SugarPea Designs blog on Sept. 20, 2021.

My teammates has crated some amazing inspiration for you using the products featured here today. Please visit each of my teammates’ blogs below for details on their projects. And while you’re there be sure to leave a sweet comment for them, giving you an extra entry to win!

Monday, September 13, 2021

SugarPea Designs Fall Sweet Peek Day 1

Hi peeps and welcome to Sweet Peek Week!! I am excited to share projects that I’ve created with SugarPea Designs NEW 2021 Fall Collection. And all of the products that we will be introducing this week will be available for purchase starting this Friday, September 17 at 2PM EST in the SPD Store (all the product links will  go live on Sept. 17)

Today we start by introducing Always Welcome set featuring an arched front door with loads of accessory images for decorating and creating a warm and inviting entryway scene.


Here. I started by stenciling the background using English Bond Brick stencil from previous release. Then, stamped all the element, arrange on card and adhere. And, guess what? You can open the door, so you can stamp sentiment inside of handwritten your message. Mine is currently blank as I want to personalize it when I know who I want to send the card to.

Would you like to win a $50 Gift Voucher to SugarPea store? Leave a comment below for your chance to win. TWO lucky commenters will be randomly selected from the Sweet Peek Week comments to win a $50 Gift Voucher! Winners will be announced on our blog: Monday, September 20th.

My teammates has crated some amazing inspiration for you using the products featured here today. Please visit each of my teammates’ blogs below for details on their projects. And while you’re there be sure to leave a sweet comment for them, giving you an extra entry to win!

Amy Kolling
Francesca Vignoli
Jennifer Timko
Kitty Day
Tatiana Trafimovich
Tricia Barber
you are here > Vera Yates < you are here

Wednesday, September 8, 2021

Spellbinders' September Clear Stamp of The Month

When I saw Spellbinders September Clear Stamp of the Month, I was so happy, because I love birds!! And the birds o this set are so sweet & cute.


I decided to combine the birds with Stained Glass Bouquet Collection by Becca Feeken die. The leaves design on the oval frame reminds me of nest, so I thought this would make a perfect background to anchor birds. I first trim a soft green cardstock and adhere it to the card base. Next, I die cut the stained glass frame and adhere it to the card as well. I wanted to use the small leaves pieces to create the in-laid look, so carefully I adhere the pieces that I want to use one by one and colored them with Copic.


Once that done, I stamped, colored and die cut the birds. Adhere them to the card with foam adhesive. Finished by stamping the sentiment, trim it and add it.

I love the way this card turned out. Basically, anything with flowers, birds, butterfly tend to make me happy. I hope you enjoy today's card. That's all for me today. Have a blessed day!


Tuesday, September 7, 2021

Spellbinders' September Card Kit

 Hi peeps. This past long weekend, I got a much needed crafting time. For me, crafting is my way to step away from stress, to unwind and stop thinking of the world for a few hours. I played with Spellbinders Card Kit of The Month. This month theme is "Better Together" and it is a fun, delightful kit.


I made 3 cards with this kit, let's check it out, shall we?


For my 1st card, I used the patterned paper and the foil cardstock for my base. Once I adhere the patterned paper and the strip of foil, I add one of the frame cardboard sticker. Next, I stamped the Russian dolls images and colored them with Copic marker. Fussy cut and adhere to card. Finished by adding the foil sentiment sticker. 

On to the next card, where....gasp... no stamping at all!! 


I simply picked some elements from the kit that I love, play with the arrangement and once I am happy with the look, adhere everything to the card base. I am loving this layering look. By keeping the background white, it allow me to layered quite a few elements while keeping it look clean & classy. What do you think?

And, last but not least, is this card that I made using the old school telephone dies.


Die cut all the telephone pieces and piece them together. Put aside. Trim a couple patterned paper and adhere them to the card base. Then adhere the phone. Goodness, does anyone born in the 90's know how to use this kind of phone? Back in the day, with this kind of phone, one thing for sure, I remember all my friends phone number. Nowadays, I only memorize the most important numbers. Okay, back to the card. Again, on this card, no stamping!! The cardboard banner stickers make perfect embellishment for the card.

There you go, three different cards to show the versatility of this month's kit. I hope you enjoy today's inspiration. Swing back by tomorrow as I'll be sharing a card I made using Spellbinders' Stamp Of The Month. Have a beautiful day, peeps.

Friday, September 3, 2021

The Ton Fall Release Day 2

 Hi all and welcome to day 2 of The Ton fall release. For this release, The Ton is introducing 19 stamp & dies and I am excited to share them with you. Let's get on to the cards, shall we?


For my 1st card, I am using the gorgeous Poinsettia Bouquet & Styled Christmas Sentiment set. I start by stamping and heat embossed the poinsettia with gold embossing powder on a watercolor panel. Then, I watercolored the image and let dry. Once dry adhere the panel to card base. Then stamp & heat embossed the sentiment and die cut it with Styled Christmas Sentiment coordinating die. Then adhere to the card and we're done. :)

Now, on to the second card.


For this card, I run a panel of cardstock with Festive Folk Coverplate die. I love, love the details of this coverplate. Adhere the pane to card base. From my card that I shared yesterday, I have the pieces from Holiday Coloring Bits that I used on this card. Arranged the bits and adhere with foam adhesive to the card. To finish, I stamped and die cut the sentiment from Styled Christmas Sentiment.

I hope you enjoy today's cards. Want more inspirations? Please check out my teammates blog. Wishing you all a lovely weekend. Cheers....

Thursday, September 2, 2021

The Ton Fall Release Day 1


Hi all and welcome to day 1 of The Ton fall release. We're already in September, can you believe it? Well, September also means it's time to start working on Christmas cards!! I know, I know, it's early, but if you're like me and don't have too much free time, it's always good to start building your Christmas card stash in advance.

For this release, The Ton is releasing a good size collection. Please note that as of this moment you can pre-order the new release on 9/3 and they will start shipping on 9/22.

For today, I am showcasing the gorgeous & detailed Fancy Folk Tree Layering Coverplates dies. There are 2 coverplate and you could just use one of the plate or use both for beautiful piercing details.


To start, I run the 1st coverplate dies on a piece of white cardstock. Afterward, I run the same panel with the 2nd coverplate. This 2nd one also cut the tree out. Next, I colored the tree by ink blending Parisian Blue, Bright Emerald, Matcha and Lemon Drop. Once I am done, I adhere the white panel to card base, followed by the colored tree. 

Next for the sentiment, I used Ribbons Holiday and stamped it with Miami Cool ink pad and the second part with Versamark embossed with gold embossing powder. The good thing is you get tp stamp several sentiments at the same time and also die cut them with just 1 run. Adhere sentiment with foam adhesive. Last for final touch, I stamped and heat embossed Holiday Coloring Bits and die cut it with its coordinating dies. I only used one of the pieces and saving the rest for my other card that I will share tomorrow! 

For more inspiration and sneak peek, please check out my teammates blog below. Stay tune and come back here tomorrow for more new release goodies. Thank you for stopping by and have a beautiful day, peeps.

Tuesday, August 17, 2021

Heffy Doodle, Maker Forte, and SugarPea Designs Collaboration Blog Hop


Welcome to the Heffy Doodle, Maker Forte, and SugarPea Designs Collaboration Blog Hop! Design Team members from all three companies are sharing inspiration using products from all three companies!

I made a couple cards for this hop. For my 1st card, I used the adorable Heffy Doodle Sealy Friends set, SugarPea Design Sunburst & Wave stencil.


I started by die cutting the scallop background with SugarPea Card Front Element Builder dies. Then, without removing the dies, I layered the wave stencil and add blue ink blending. Next, I layered the sunburst stencil and ink up a couple different yellow hues. Once this done, then, I removed the dies. Adhere the panel to this pretty soft green Matcha cardstock from Maker Forte. This is my favorite soft green cardstock. Next, I colored the seals and the clouds (from Heffy Doodle Quack Me Up set). Fussy cut them and then adhere them to the card. Finish by stamping the sentiment, add some shimmer and some enamel drops.


Now, for my 2nd card, I completely switch gear from cutesy to floral.


For this card I used this gorgeous Hugs set by Alex Syberia Design for Maker Forte. I inked it up using Maker Forte Eclipse Black ink. And, wow... I am not usually easy to impress when it comes to ink, but this black ink is solid dark black. And it works perfectly with any alcohol markers. Colored the flowers and once finished, trim the panel and adhere it to the Matcha card base. Finished by stamping the sentiment from SugarPea Floral Envie set and add some enamel drops.


BLOG HOP DETAILS:

To be entered to win the giveaway, all you need to do is comment at each stop along the Blog Hop!
Maker Forte will be giving away $35, Heffy Doodle will be giving away £25, and SugarPea Designs will be giving away $25 to their respective stores!  Be sure to comment before 11:59 PM EST on Aug 20th to be entered to win!

Each company will post their random winner on Aug 21st at 10AM EST!  Make sure to check the Heffy Doodle Blog,  Maker Forte Blog, and SugarPea Designs Blog to see if you’re a winner!

From here, the next stop is SugarPea Designs Blog. In case you missed any link, below isthe compelete list for the hop. Thank you so much for joining the fun.


Blog Hop Lineup:


you are here --> Vera Yates <-- you are here

The Ton December Release

Hi friends. Welcome to The Ton December release. We have quite a few fun, goodies line up for this release. But, as bird lover, I just have ...